Instructions for Using Tim's Header Maker
Instructions for Tim’s Header Maker
Simplified Version
Mar 25, 2024
Video Tutorial
Existing Tech Required:
Access to a Google account with Google Sheets
Purpose:
Clean a basic dataset before uploading to sumApp (helps insure your data will upload error free)
Create survey questions for uploading to sumApp (it can save time)
Do a combination of #1 and #2
Create your copy of the Header Maker
Make your own copy of the Header Maker in a Google Folder
Click this link for the Header Maker Simplified Public V1.5
Click on the Blue Button: “Make a Copy.”
You may rename the Header Maker Google Sheet.
Read the disclaimer on the first ‘Read Me’ tab that opens with the sheet
Click ‘QUESTOUPLOAD’ tab on Google Sheet
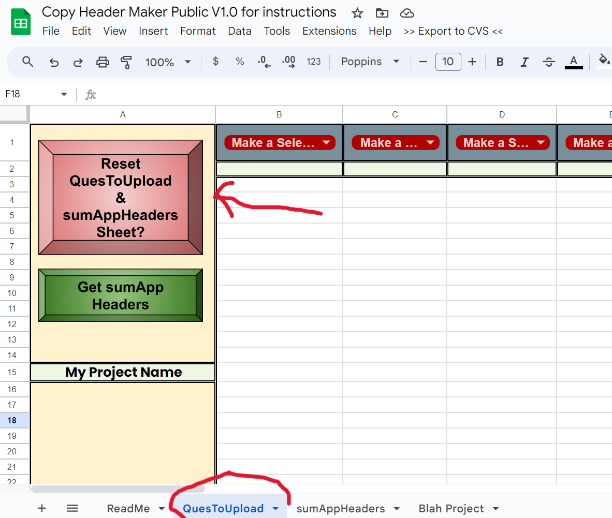
The first time you use the Header Maker, you need to grant permission for the “script” to run.
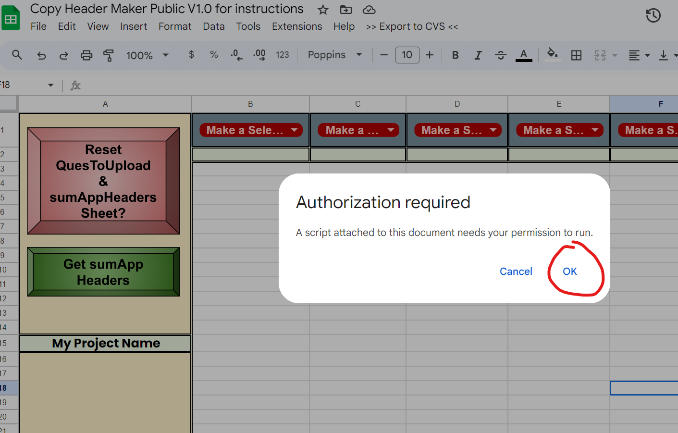
Click Reset (red button) top left
You will see Authorization required in a pop-up box. Click “OK”
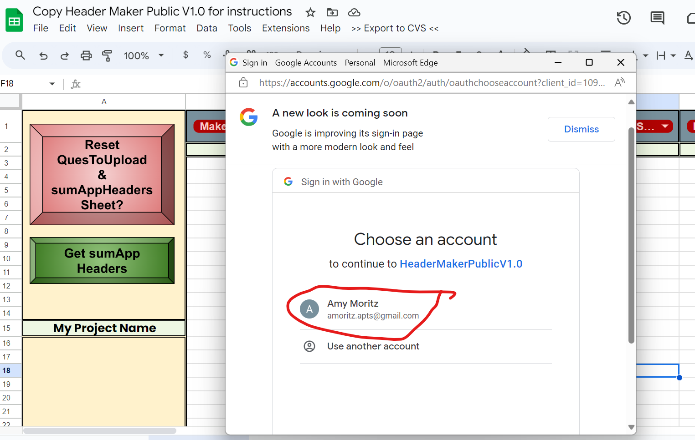
On the next pop-up, choose your gmail account.
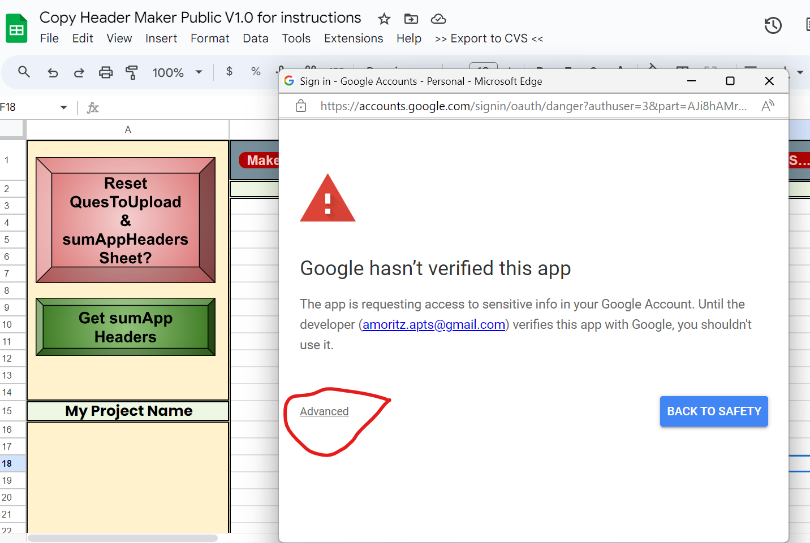
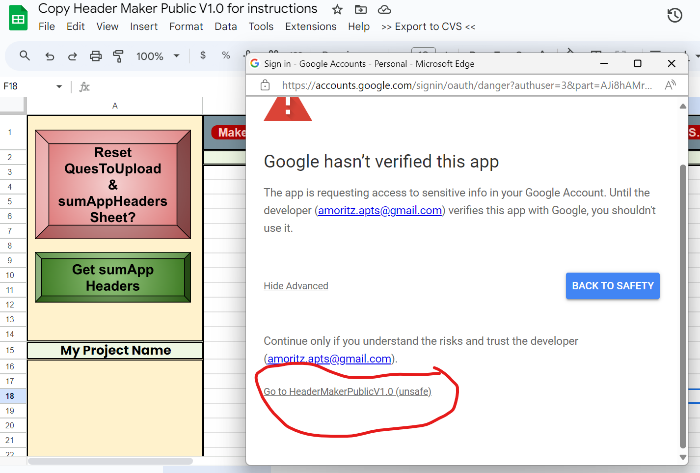
You will see a pop-up that Google hasn’t verified this app. Click Advanced.
Then you can click the link that says “Go to HeaderMakerPublicV1.0 (unsafe)
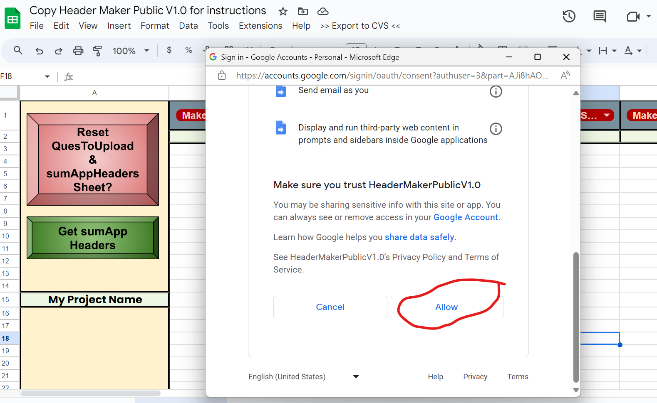
On the next pop-up, scroll to the bottom of the pop-up and click Allow
You may see a quick message that Authorization is complete. Congratulations. You are ready to use the Header Maker!
Using the Header Maker
If you are working with a new project, you will want to Reset at the beginning. This clears the existing data.
Confirm that you want to clear Data by clicking ‘OK’.
Then confirm that you want to clear the “sumApp Headers sheet” by clicking ‘OK’.
Uploading a list of people in sumApp
You can use the Header Maker to clean the dataset before you upload it to sumApp. The instructions below are for the basic sumApp dataset. First Name, Last Name, Email, Email2 (optional), Email3 (optional), Segment (optional). If your dataset includes more than this, it is considered to include preexisting data. Refer to the instructions for datasets with preexisting data.
DON’T COPY AND PASTE YOUR DATA INTO THE HEADER MAKER. USE IMPORT ONLY.
Import your data
Click “File” in the upper left corner
Click “Import” in the dropdown box
If the file resides on your computer, select “Upload.” Select your file and “Open.”
Then select “Insert New Sheet” and hit “Import Data” button.
Then you can rename the new sheet to your project name.
Clean your data
Go do the sheet titled “sumAppHeaders” sheet.
Click on Column A where it says “Get your data from sheet.” A script will run and you’ll get a pop up box on the right side.
Select the sheet to which you imported your data. Hit “submit.”
You’ll see a Data Moved pop-up box. Hit “OK.” And, close the pop-up box to the right.
Skip Column B ‘Proper-size the Data’ unless you are including pre-existing data in your project data set.
Go to Column C and click “Validate Data.”
The script will run to search for errors in your project data. The script runs by reviewing each column at a time and prompting you if there are any errors.
For example, if your data set were missing first names in column A you would receive this prompt.
Read the instructions in the pop-up box and hit “OK.”
EVERY Member Must Have a First Name
If You Want The First Name In sumApp To Be BLANK Then Add Hypen '-' as First Name
EMPTY Cells Have Been Sorted To The Top Of The Sheet
Please Fix The Issues
Then Run The Validation Again !!
Fix the First Name data cells that come to the top and rerun the Validation. It is important that you click outside the cells you edit for the spreadsheet to recognize the change.
Click on ‘Validate Data’ again until you get the pop-up that reads “First Name Column Looks Good.” Hit “OK.”
The script will continue to prompt you for errors in each column, if there are no errors you will receive a pop-up that reads “X Column Looks Good” Continue to Hit ‘OK’ until an error appears. If no errors appear you will receive a grey ‘Finished Script’ pop up in the top-middle of the sheet.
In addition to checking for errors, the script has automatically taken care of non-printing characters or other odd things that could impact your data upload to sumApp.
Now, you are ready to export to a CVS file for uploading into sumApp.
You can hit the “Export as CVS” button
Or, you can download using the file function at the top left.
Do NOT copy and paste your data into a csv. Use export or Download function.
Uploading sumApp Questions Created in a Word Document
If you have developed your questions in a Word Doc or other software, you don’t have to retype them into sumApp. You can use the Head Maker to prepare the questions you have already typed for uploading into sumApp. Have your Word Doc open. You will cut and paste from it into the Header Maker.
Note: Paste into a tool like Notepad first to ensure that extra spaces and carriage returns do not come over.
Go to the ‘QUESTOUPLOAD’ worksheet.
Row 1 is used to tell it the type of question this is.
Select Boxes will make it a checkbox question
Select will make it a Dropdown menu
Text Area allows for the entry of a single line of text
Text Input allows for longer text entries such as a paragraph
Row 2 (light green) is where you can paste or type your question
Rows 3+ is where you will paste or type the data options for your questions.
From left to right (column B to Z), make sure you put the questions in the order in which you want them to appear in sumApp.
In Column B,
Row 1: select the type of question
Row 2: Enter the question as it will appear in sumApp
Row 3+: Enter the data options, if applicable.
Repeat above until all of your questions are in the spreadsheet.
Then hit the green button on the left that reads “Get sumApp Headers”
Click on the worksheet “sumAppHeader.” Your questions have been added to the right in Row 2 following ‘Segment’.
This can be exported as a CSV and imported into sumApp. Remember that you need at least one person in your dataset for the questions to import into sumApp.
Sample Dataset & Questions
If you’d like to practice using the same dataset in the instructional Video, you can use these links below:
Upcoming Events
Related Articles
Instructions for Using Tim's Header Maker Part 2
Instructions for Tim’s Header Maker Public Full Version Jul 25, 2024 Video Tutorial Video- 25 minutes Existing Tech Required: Access to a Google account with Google Sheets If this is the first time to use the Header Maker Google Sheet, please refer ...How to Control the Order of Your Filters Option List; Drop-downs, Buttons, Links Outside of Kumu’s Alphabetical Listing Option List
To get the Option list maker go here: https://docs.google.com/spreadsheets/d/1afyUaG9ZrrIQzlWmp7hYNeoDMaC19YyRjyj7EwIGWBc/edit?usp=sharing FIRST: you have to make a copy of it NEXT: click the big Green button THEN: you have to give it permission ...Tim's How-To Videos
A Complete List of Tim's Explainer Videos How to validate a members .csv file before adding it to sumApp Addresses all the ways your .csv upload could produce errors, and includes some script to help you eliminate those errors before attempting to ...How To Load Pre-Existing Data Into sumApp | Tiers III & IV
What Is ‘Pre-Existing’ Data? Pre-existing data is information about your members that you’ve already gathered from other sources. For instance, you may have street addresses, organization names, titles or other info from event registration forms. Or ...Adding Pre-existing Data: Preliminaries
A preliminary video on what to expect when adding pre-existing data to a sumApp project. Please watch: How to Validate a Members CSV file Before Adding it to sumApp before watching this video Length of video is 4:54