Project List Page

Click on images to enlarge
The project list gives you an overview of your projects and access to all aspects of each project:
1) Create button. Create a new project (assuming your account allows for more).
2) Trash Can Icon. Delete or archive a project.
3) Manage. Drops down to access all project management tabs.
4) Network name. Identifies the project and shows at top of member view pages (#5).
5) Project name shows at top of member view pages - defined by project name.
6) Toggle project open or closed. When closed, members can't access survey or connections tab to input data. They can still access the Bio tab and the Map tabs. Closing the project is a matter of preference. It's not technically necessary, even when making changes to the survey or connection options.
7) Deadline. Shows the deadline defined in Projects > Setup > Define email templates. Deadline is not functional. It doesn't turn anything on or off, it simply available as a field in the email templates.
8) Total Members. Indicates how many members have been loaded into the member list. This also the number of member tiles that show on the Member View Connections Tab.
9) Invited. Indicates how many members have been sent an invitation from sumApp. Doesn't count sends from other email clients, such as MailChimp or a personal account.
10) Started. Indicates how many members have clicked on the link in the email invitations sent from sumApp. Doesn't count link clicks in emails sent from other email clients, such as MailChimp or a personal account)
11) Connections Made. Indicates total number of connections made be all participating members.
Create a New Project
1) Click the green 'Create' button above the project list
2) Name the project (will show in member view). You can't use the same project name twice.
3) Cancel to back out and not create a new project.
4) Click green 'Create Project' button to save new project. You'll be able to access the project from the 'Manage' button in the project list.
Delete a Project
A project you no longer need can be:
- Deleted completely
- Deletion is not reversible - you should download your data to your desktop if you think you'll ever want it again.
- Archived
- An archived project stores a project's data, but the project interface cannot be resurrected. You can return at a later date to access your data. You will not be able to re-open and gather new data in an archived project.
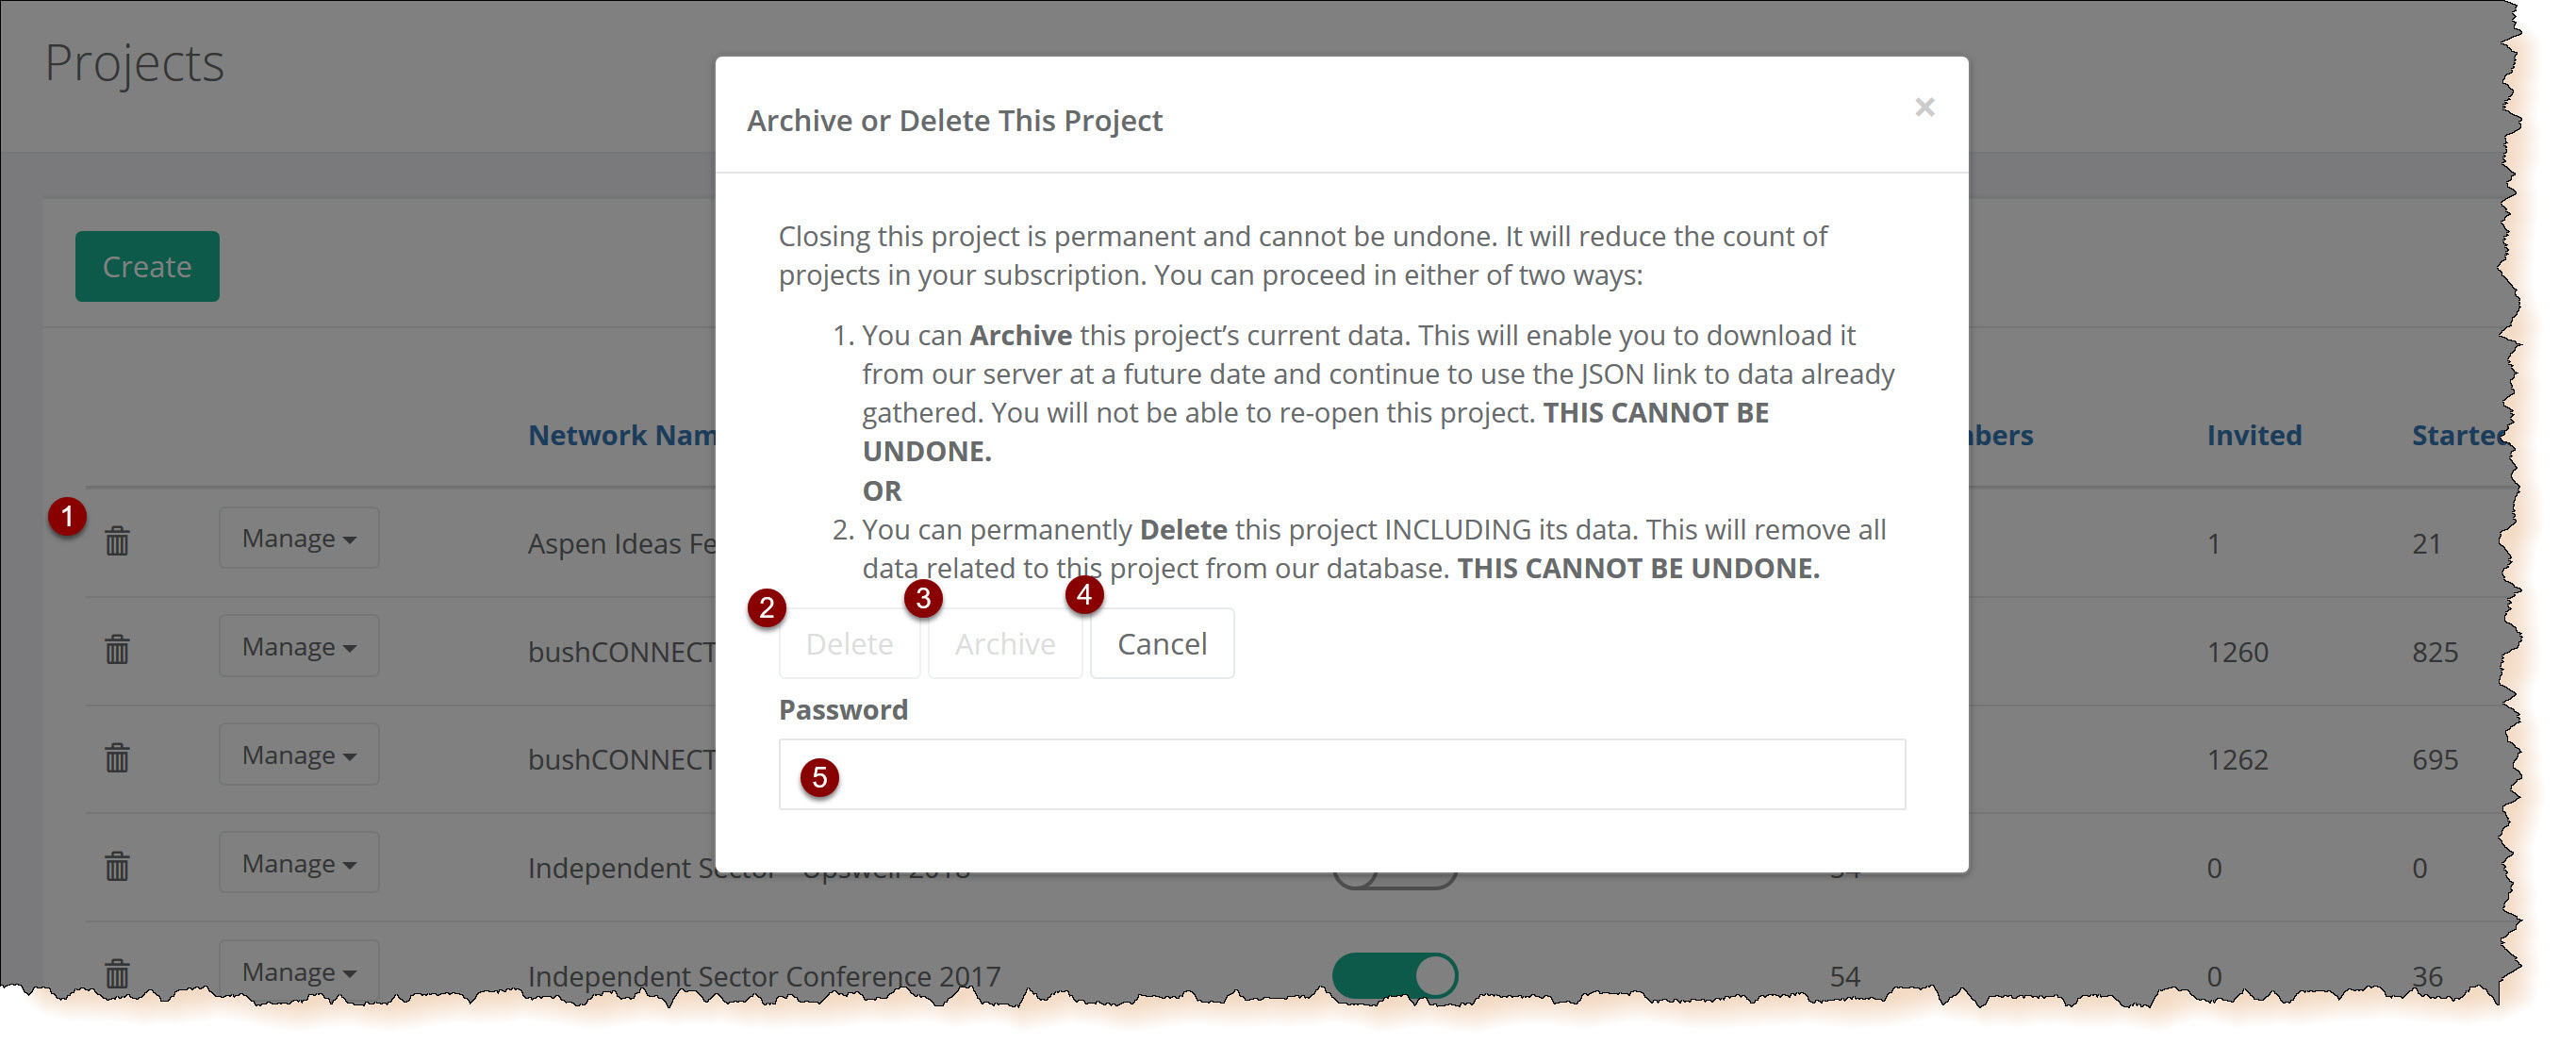
To delete or archive a project:
1) Click the trash can icon at the front of the project you want to remove
2) Select whether you want to delete it (remove everything forever),
3) or archive it (keep the existing data)
4) Cancel to change your mind and leave the deletion dialog box.
5) Enter your account password.
Use 'Manage' Button to Access All Your Project Pages
Click 'Manage' button to access your project management pages. Edit Survey Form. Create your survey/profile questions and options. Edit Connection Options. Create the relationship-type options that enable members to define how they are connected to one another. Define Email Templates. Create and save the email text for each of up to 4 types of email invitations. Includes 'from email' 'from name' and deadline fields. Define Settings. Includes various in-app texts, survey show/don't show toggle, and map tab embed code input. Add Members. Upload members via .csv or enter by hand. Manage Invitations. Send one or more of the 4 invitation types to all members, depending on what they've been sent in the past. Manage Members. Access your member list. Edit, delete, send one-off emails, add new member manually, and check status of all members. Download Data. Access data via .csv download, .json download or live .json link. Time Tags. Define timeframes for tracking network changes over time. Import connections. TIER IV only. Import connections from one project into another (from same account) - where there is member overlap between the projects. Connections List. TIER IV only. View connections after imported. Can delete if needed.
| |
