Instructions for Using Tim's Header Maker Part 2
Instructions for Tim’s Header Maker
Public Full Version
Jul 25, 2024
Video Tutorial
Existing Tech Required:
Access to a Google account with Google Sheets
If this is the first time to use the Header Maker Google Sheet, please refer to the instructions for Part I.
Part II
Preparing Pre-Existing Data
Before you begin
Must have a tier III or IV account to upload questions and/or pre-existing data.
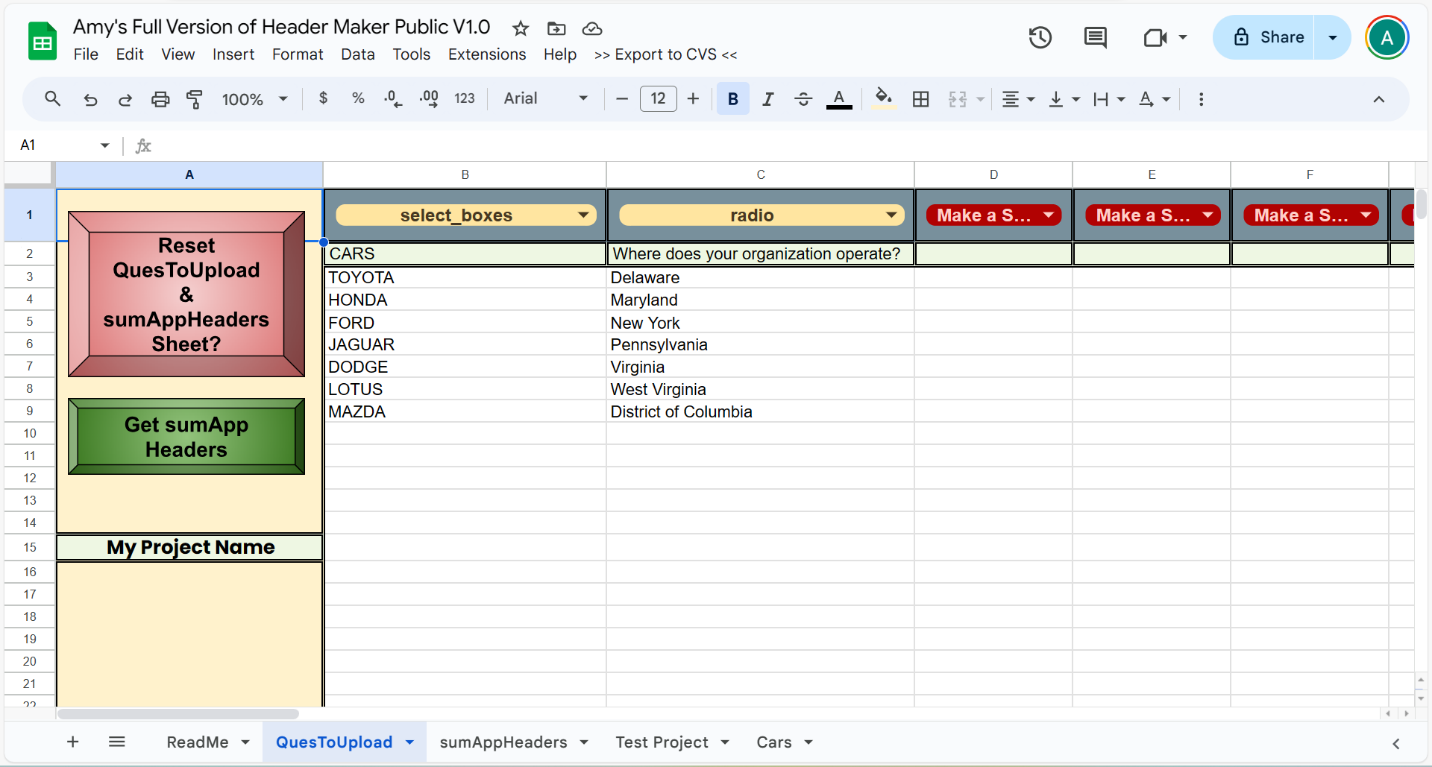
Your original data does not need to be in the order that you want it to appear in sumApp. The Header Maker will order it for you when you run the script embedded in the Header Maker Google Sheet – It will order the basic fields first and then order the remaining fields to match the order of your Questions in worksheet labeled QuesToUpload.
For example, here is the original dataset. The Header Maker will put the dataset below in the proper order.
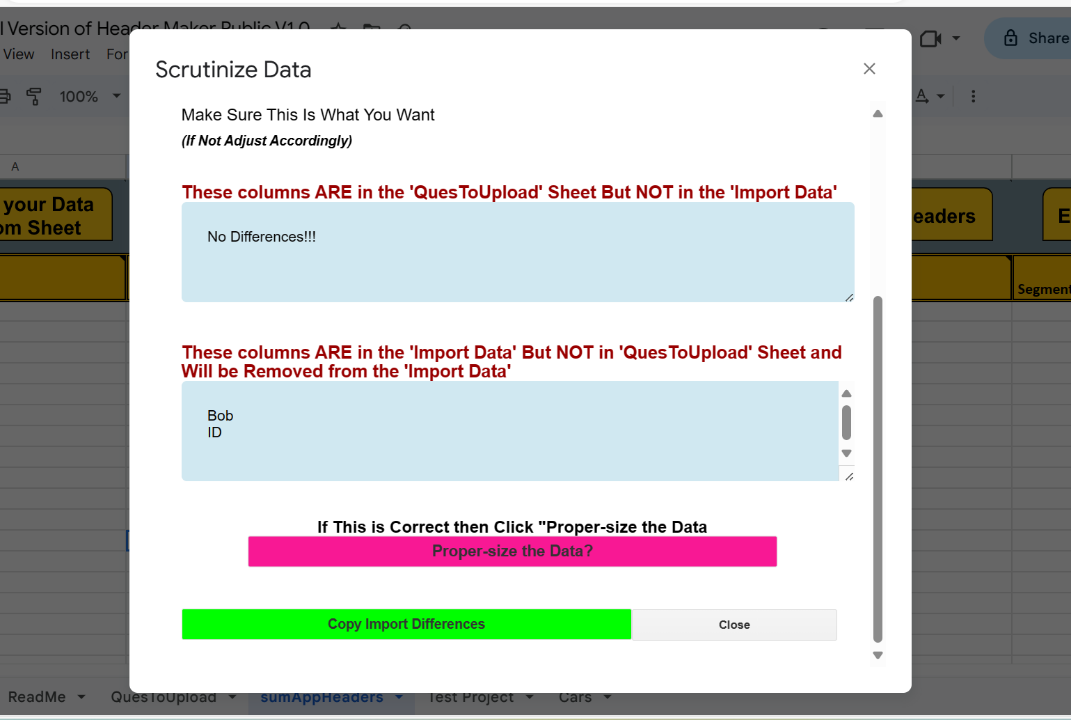
On the sumAppHeaders worksheet, click the “Proper-size the Data” button.
Next you will see a pop-up box that allows you to confirm that you want to proceed:
If you have columns that ARE in the 'QuesToUpload' Sheet But NOT in the 'Import Data', this questions will still be added to the sumAppHeader worksheet.
If you have columns that ARE in the 'Import Data' But NOT in 'QuesToUpload' Sheet, they will be removed from the sumAppHeader worksheet.
If you are not OK with what you see in the pop-up box, hit close and fix your data and/or questions.
If you are OK with what you see in the pop-up box, hit “Proper-size your data?”
Here is an example of the pop-up box.
Validate Data
Next you will hit the “Validate Data” button. If you need instructions for this step, refer to Part I of the Header Maker instructions.
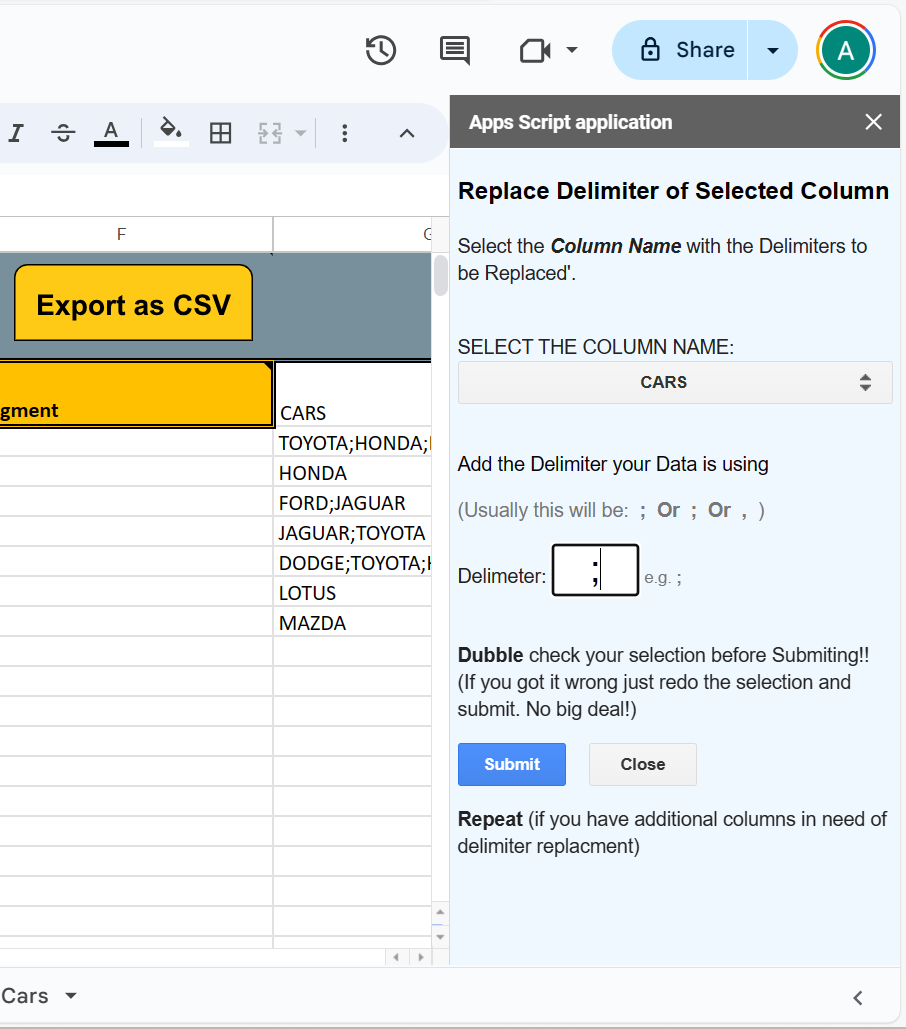
Replace Delimiter
If you have questions with multiple selections, you will use the “Replace Delimiter” button to insure that the data you are preparing is using a pipe | as the delimiter and not some other character. The pipe | is required when uploading this data to sumApp.
If you have more than one question with multiple selections, you will do the following step for each question with multiple selections.
Hit the “Replace Delimiter” button.
You will be presented with a pop-up box where you can tell it 1) the column that contains delimiters and 2) the type of delimiter that needs to be replaced with a pipe |.
Hit the “Submit” button.
NOTE: In the rare event that your data includes the same character as your delimiter, the program will know what to do by looking at your Question option list in the QuesToUpload worksheet.
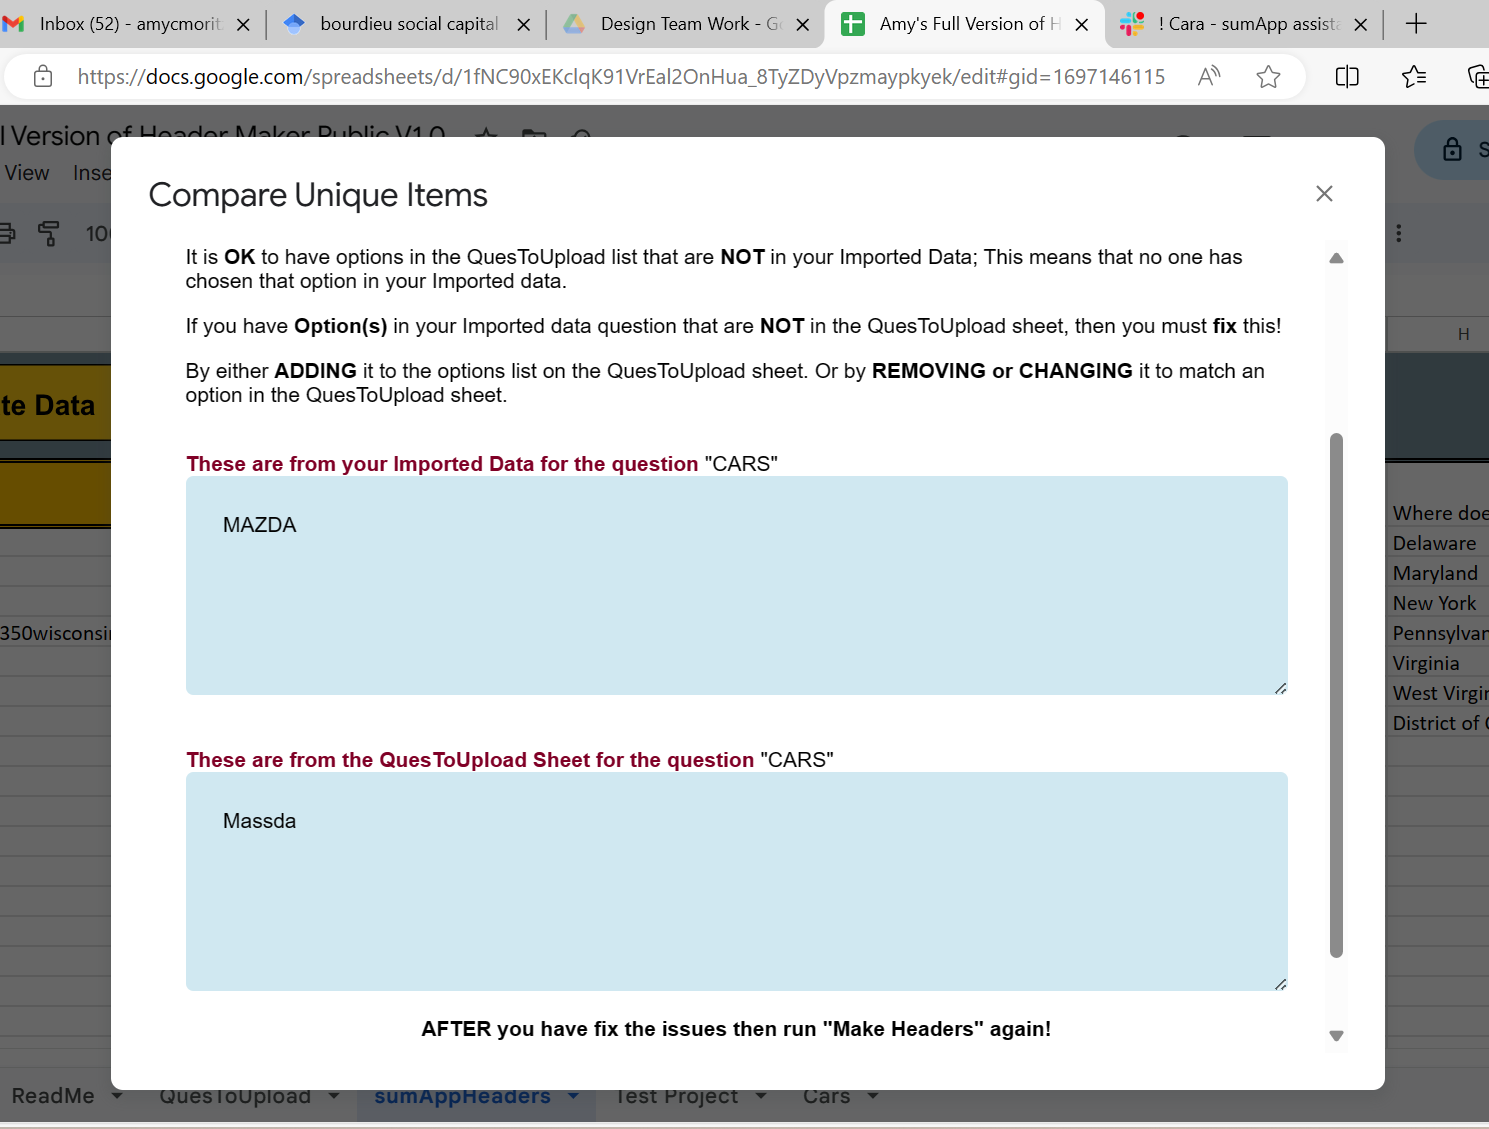
Make Headers
The option list for each Question must contain all the different options that are currently in your dataset.
It is acceptable for your option list to contain items NOT found in your dataset. This simply means that no one has selected this option.
Hit the “Make Headers” button. It will check that the options list is complete relative to your dataset. Review the pop-up box and correct anything that may need correcting before continuing.
In the example below, “MAZDA” is in the dataset but not in the option list. And, “Massda” is in the option list but not in the dataset. In this case, there is a typo in the option list. Close the pop-up. Fix the typo. Run the “Maker Headers” again until all errors are fixed.
Note: sumApp is Case sensitive. It is important that you use the case (upper or lower) that you have in sumApp or want to add to sumApp. For example, if I type “Mazda” in Questoupload, but sumApp already has an option that is “MAZDA”, “Mazda” will be added when I upload this data.
Once “Make Headers” runs successfully, your sumApp Headers worksheet will now have your questions from the QuesToUpload worksheet as the first row.
Note: “Maker Headers” button is used when you are working with a pre-existing dataset. When you are not working with pre-existing data, you will hit the green button on the QuesToUpload worksheet labeled “Get sumApp Headers.” (Refer to Part I of the Header Maker instructions.)
Great Job!
Now you are ready to export the data from your sumAppHeaders worksheet into a CSV for importing into sumApp.
Importing into sumApp
Your CSV needs to be saved as a “CSV UTF-8.”
Download your Member list CSV from sumApp. This is to insure you have a backup of your current data should anything go wrong.
Import your new data.
Double check that no new questions were added that you did not intend to add by looking at the survey set up.
sumApp will not overwrite/update existing data. However, if you have new data for your members it will be added to their record.
There are just a few exceptions to this: sumApp will overwrite First Name, Last Name and Segment using the Email.
If you’d like to practice using the same dataset in the instructional Video, you can use these links below:
Upcoming Events
Related Articles
Instructions for Using Tim's Header Maker
Instructions for Tim’s Header Maker Simplified Version Mar 25, 2024 Video Tutorial Video- 25 minutes Existing Tech Required: Access to a Google account with Google Sheets Purpose: Clean a basic dataset before uploading to sumApp (helps insure your ...How to Control the Order of Your Filters Option List; Drop-downs, Buttons, Links Outside of Kumu’s Alphabetical Listing Option List
To get the Option list maker go here: https://docs.google.com/spreadsheets/d/1afyUaG9ZrrIQzlWmp7hYNeoDMaC19YyRjyj7EwIGWBc/edit?usp=sharing FIRST: you have to make a copy of it NEXT: click the big Green button THEN: you have to give it permission ...Tim's How-To Videos
A Complete List of Tim's Explainer Videos How to validate a members .csv file before adding it to sumApp Addresses all the ways your .csv upload could produce errors, and includes some script to help you eliminate those errors before attempting to ...Adding Pre-existing Data: Preliminaries
A preliminary video on what to expect when adding pre-existing data to a sumApp project. Please watch: How to Validate a Members CSV file Before Adding it to sumApp before watching this video Length of video is 4:54Using the Graph Commons data output
sumApp now works with both Kumu AND Graph Commons! Graph Commons is an Open Source graph visualization platform that does most things differently from Kumu, and it does some things much better. So to give our sumApp users the best of both worlds, we ...